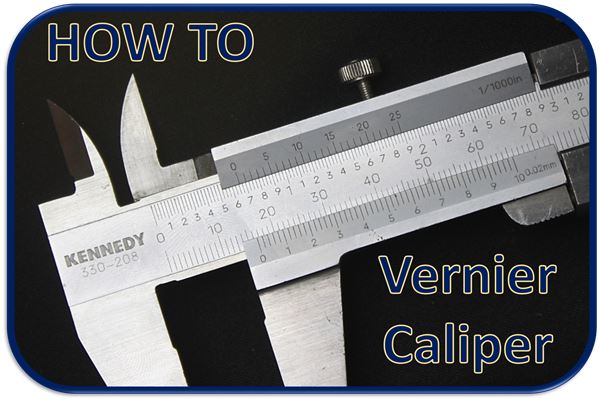
I was helping to teach a machine shop class a few weeks ago and I noticed that a lot of people were struggling to use a Vernier caliper. Therefore I thought I would put together this how to guide. The Vernier caliper is probably the most widely used of the precision measuring tools in most engineering workshops. Vernier calipers come in two main flavours: manual and digital. However, we will only be discussing the manual version in this article; as once you can use the manual one, the digital one is self-explanatory.
Ways to use a Vernier Caliper
A Vernier caliper can be used in three main ways:
- Outside measurements.
- Inside measurements.
- Depth measurements.

Here are a couple of things that will help you to accurately measure the part you are interested in:
- Keep the caliper square to the surfaces you are measuring.
- Maximise the amount of contact area between the Vernier caliper and the part; this will help you to keep the caliper square.
Reading the Vernier
Vernier calipers come with a variety of scales; in my opinion the most useful ones come with two scales:
A metric scale with a resolution of 0.02 mm.
An imperial scale with a resolution of 0.001 in.

The Metric scale
Reading the metric scale of the vernier caliper is a two-step process.
- Read the main scale which gives you the number to the left of the decimal point
- Read the Vernier scale which gives you the numbers to the right of the decimal point.
Metric Example
In the picture below, the zero line on the Vernier scale is between 24 mm and 25 mm on the main scale. This means that the value will be 24 point something.

When you make this first reading make sure you read where the zero is and not the edge of the caliper. A lot of people make this mistake!
So far we have 24 mm
The 1st Decimal Point
By looking to see if the zero is closer to 24 mm or 25 mm you can approximate the first number after the decimal point. Since the zero is closer to 24 mm you know that the first decimal place will be somewhere between 0 and 0.4. If the zero had been closer to 25 mm then it would be between 0.5 and 0.9.

Since you already know that the first decimal place is between 0 and 4 you only need to look at the first half of the Vernier scale. Each numbered line on the Vernier scale will be between two lines on the main scale. You need to find the first numbered line on the Vernier scale whose closest line on the main scale is to the right. Start at 0 and work your way along.

The closest lines to 0, 1 & 2 are on the left.
The closest line to 3 is on the Right.
To get the first number after the decimal point you take the number you just found, 0.3 in this case, and subtract 0.1. You have to subtract 0.1 because the number you just found is the next whole tenth larger than the part. This might seem a little bit strange at first, but once you have measured a few parts you will do this step without even thinking about it. Therefore, the first number after the decimal point is 0.3 – 0.1 = 0.2
So far we have 24 + 0.2 = 24.2 mm
The 2nd Decimal Point
To get the second decimal point you use the short lines between the tenth of a millimeter lines. There are 4 short lines between each one tenth lines, therefore each of these short lines represents 0.02 mm. You are now looking for which of the short lines between 2 tenths and 3 tenths line up best with a line on the main scale. In this case the second line is the closest.

This gives you a value of 0.04 mm which is added to the previous value of 24.2 mm.
That gives you a total of 24 + 0.2 + 0.04 = 24.24 mm
I can’t see which one lines up best..
Now some of you might be thinking that you can’t really see the difference between 24.22, 24.24 and 24.26 and that is quite normal. Getting an accurate second decimal place reading can be quite tricky as the lines are all so close together. It takes a bit of practice. A lot of people teach this using a diagram with the lines all nicely spaced out to make it easier to read. The reason I chose to use a caliper was so I can highlight that you need to be very careful when finding the second decimal point value. It is very easy to make a mistake. Thankfully for a lot of jobs a single decimal point is accurate enough.
The Imperial Scale
Reading the Imperial scale uses the same concept as the metric scale but is subtlety different. When you are using the imperial scale the main scale gives you the number to the left of the decimal point and also the first number to the right as well. On the main scale the big numbers represent whole inches and the 0 to 9 in between are tenths of inches.

In the picture below the zero on the Vernier scale is after the 1 inch mark and lines between the 2 and 3 on the tenths scale.

That gives you a first reading is 1.2 inches.
The 2nd & 3rd Decimal Points
Looking between 1.2 inches and 1.3 inches you can see there are 3 small lines. Each one of these lines represents 0.025 inches. The zero on the Vernier scale is between 0.025 and 0.050 which gives us out next reading of 0.025 inches.

This is then added to the previous reading of 1.2 inches.
Which gives a reading of 1.2 + 0.025 = 1.225 inches.
Finally, you need to look at the thousandths of an inch scale to see which line lines up best with the main scale. In this example it is 12 thousandths.

This is then added onto the previous value.
Which gives a final reading of 1.2 + 0.025 + 0.012 = 1.237 inches.
Your Turn
If you think you have got a grasp on how it works why not have a go at the one below; the answers are just below the picture. If you are still not sure feel free to work through the examples again.

Answers
Fifty seven point four two millimeters & Two point two six one inches.
Congratulations if you got them right. Don’t be disheartened if you didn’t it does take a bit of practice!
Zero Point Error
Great, so you can now properly measure a part and correctly read the Vernier scale; so that’s all you need to know right? Not quite, there is one last thing; it’s called zero point error.
Zero point error is where the calliper reads a value other when zero when the jaws are closed. (When the zero on the vernier scale does not line up with the zero on the main scale). My own Vernier caliper for instance reads -0.06mm, this means that I have to add 0.06 to every measurement I make. If you had a caliper that read a positive value, say 0.04, you would have to subtract 0.04 from your measurements.
Finding your zero point error is easy. All you do is make sure the jaws are clean, slide the caliper closed and take a reading. Once you know the error it is worth writing it down and sticking it on the back of the caliper. That way anyone who picks it up can easily see what the zero point error is.
Positive Error
Positive errors occur when the zero on the Vernier scale is to the right of the zero on the main scale. The readings are fairly obvious as they are exactly the same as measuring a normal part.
- Remember if you have a positive error you need to subtract the error from the values you measure.
Negative Error
Negative errors occur when the zero on the Vernier scale is to the left of the zero on the main scale. To find out what the error is you have to read the Vernier scale backwards from 10. Each line is still 0.02 mm so if the first line to the left of 10 lines up with a line on your main scale your error will be -0.02; the second line, -0.04 etc.
- Remember if you have a negative error you need to add the error onto the values you measure.
If you made it this far you should have a pretty decent grasp on how to use a Vernier Caliper.
Congratulations you have just gained a valuable workshop skill.
Cheers,
Rob