Being able to complete projects in your workshop primarily relies on your skills and to a lesser extent the cost of your tool box. That said, I am a firm believer in buying quality tools. It’s like my dad always said “buy rubbish, buy twice”. Thankfully a home workshop that will allow you to do a few simple projects and DIY tasks can be got up and running on a budget. Once you gain a few more skills and take on larger & more complex projects you can grow your tool collection and work space as money, and your partner, permits.
I have tried to cater this list to someone who could be doing a little bit of everything (Woodwork, Metalwork, Vehicle maintenance etc) as well as doing some DIY around the house, therefore the tools I have selected are typically very versatile tools that can carry out multiple roles. Using versatile tools means that you get undertake a wider range of jobs and projects for less cost.
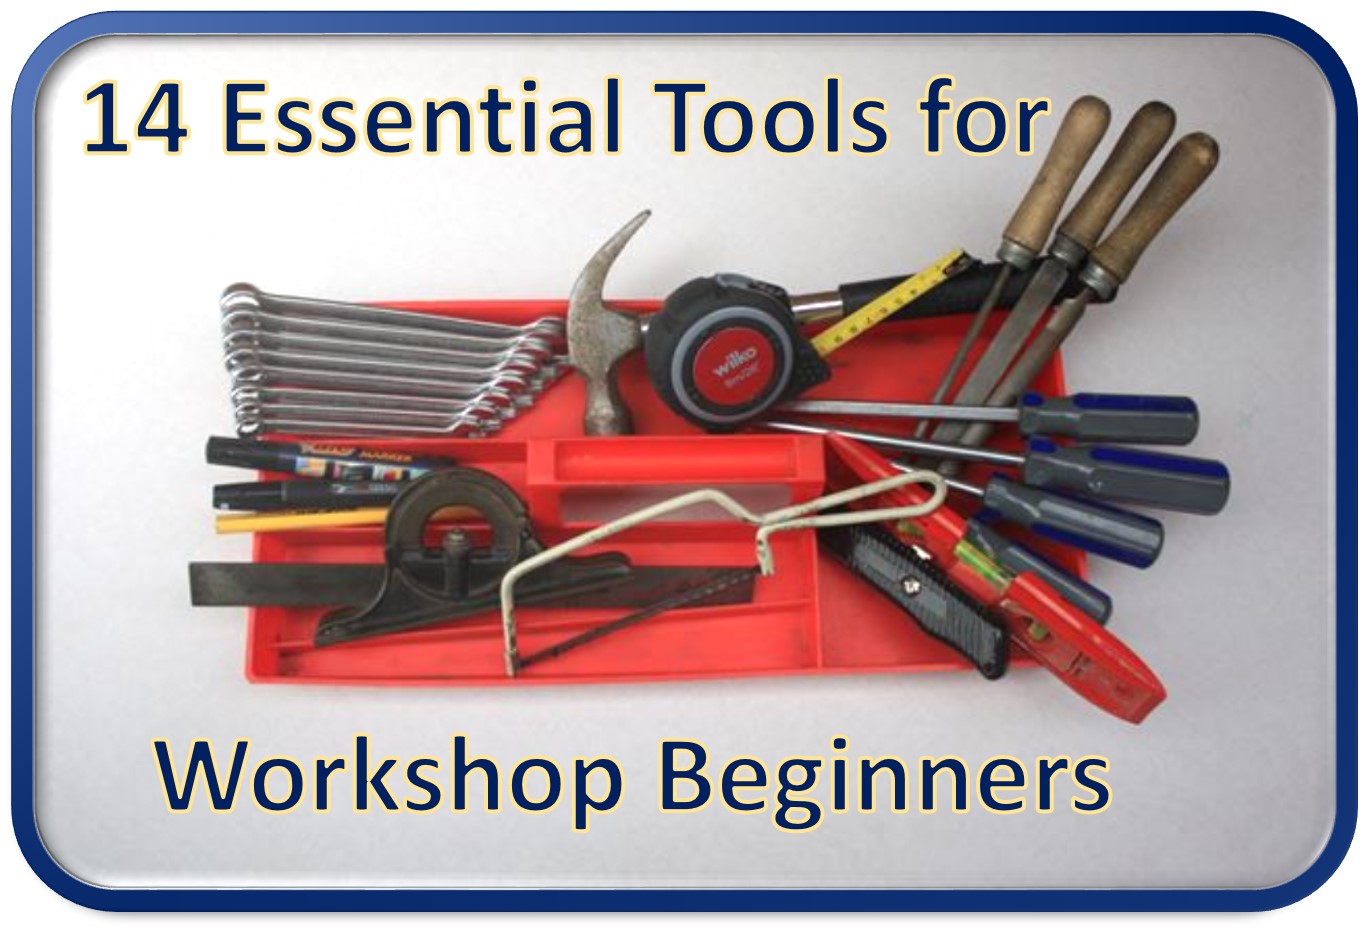
So here we have it 14 essential tools for the workshop beginner.
Tape Measure
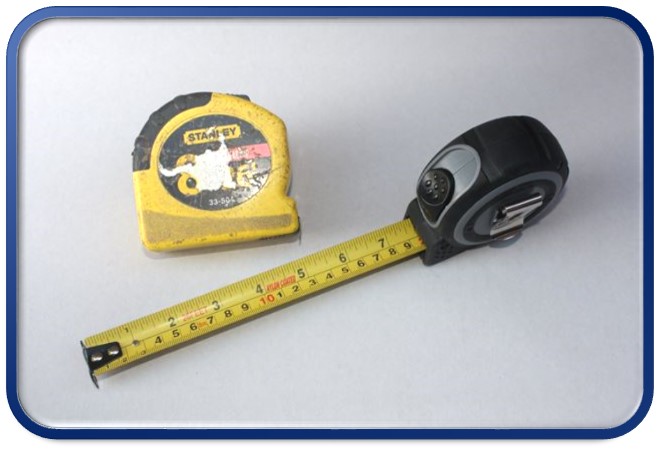
Being able to measure the things you are making is normally critical to the success of your projects. Having a retractable tape measure on hand allows you to quickly check how wide the space is that you are trying to fit that book case into or measure the length of those bits of wood / metal you want to cut down for that new bench you want to make. I’d recommend a tape of around 8m / 26ft as a general-purpose tape, it’s long enough for most indoor and outdoor tasks but not too cumbersome to carry around. A couple of features that are worth considering are;
- A lock switch to allow you to extend the tape then lock it at that length so it does not roll back up – This is a must for me and almost all tapes have one.
- A brake button will allow you to slow the tape down as it retracts – This is a good feature but not essential as slowing the tape down before fully retracts helps to prevent the end from getting damaged.
- A belt clip – Again not essential but nice to have.
- A bright coloured case – Not normally the first thing people think about, but it does make finding it on a cluttered bench or in full toolbox a bit easier.
Protractor
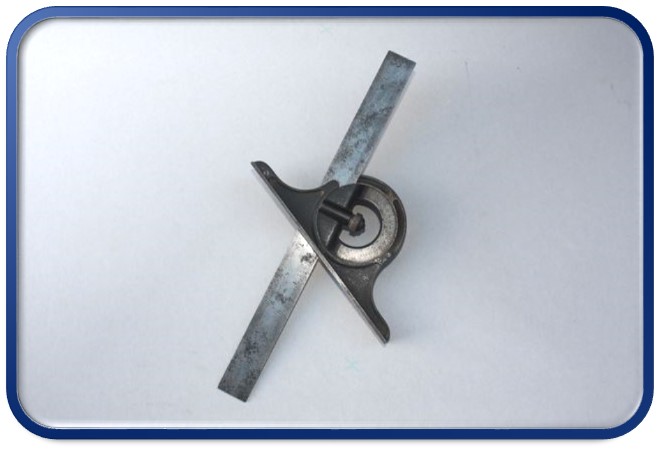
Being able to check for square (90 degrees) is critical for any jobs that require you to assemble multiple parts together. Like all tools there is a selection of squares to choose from and a selection of sizes. My recommendation for the beginner would be to get a 300mm / 12in protractor rather than a square. Although often not as accurate is a fixed tri square for measuring at 90degs it has a couple of advantages for the beginner.
- Checks angles from 0 to 180 degrees
- Includes a 300mm / 12in steel ruler
- Can be used as a depth gauge
- Often include a small spirit level
Spirit Level

Many people see this as a builder’s tool but the humble spirt level should be found in every workshop. The spirit level will allow you to check for horizontal and vertical which is essential when you are fitting those new kitchen units. It will also provide you with a long straight edge which is ideal for marking out long lines for cutting along. It’s worth buying a good quality level as you will more than likely find it is a tool you use a fair bit and a level that is not accurate and / or straight is next to useless. For the beginner I’d recommend one somewhere around 1m / 3ft long. It’s tempting to buy the longest one, but they are typically unwieldy for the majority of jobs.
Pens / Pencils / Markers
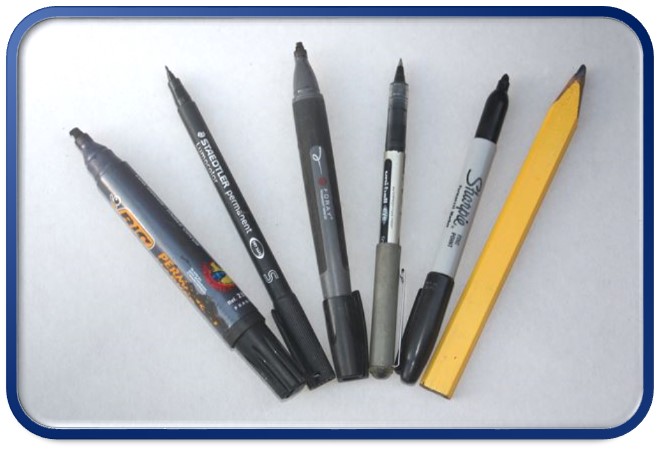
Not the most exciting I know, but you can never have too many pens & pencils in your tool kit as they are constantly getting put down and lost.
- Pens – Biros and the uni-ball type are great. They are cheap and come in a selection of colours.
- Pencils – Not out of your partner’s or your kid’s art set but rather the big rectangular ones that carpenters use. You can get a box full for a few £’s / $’s
- Markers – Big thick permeant felt tip markers. You can get them in pointy tip for writing and chisel tip for colouring in.
Related but not worth a section on its own is a notepad. Well worth having a pad in your toolbox for quick sketches or calculations. Having them in a pad also helps to prevent you loosing random bits of paper.
Saw
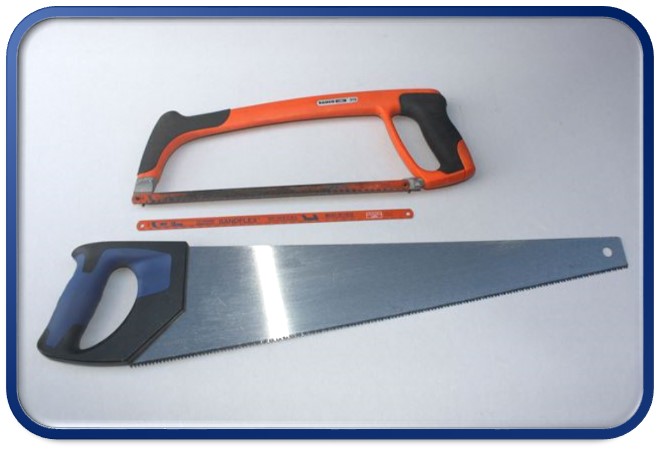
Back to the interesting tools, saws. Typically, there are two main types of hand saw; wood saws (for wood) and hacksaws (for everything else). If you can afford it its worth getting a general-purpose hand saw and a 300mm / 12in hacksaw with a selection of blades. Saw blades are rated in teeth per inch (TPI) if you are cutting thin material you will need a blade with more TPI than if you are cutting thick material. A good starting point for a woodworking handsaw saw is around 7 – 10 TPI. The design of the handsaws handle also doubles as a square allowing you to mark out lines at 90deg and 45degs. You will find when you buy a hacksaw they often come with a selection of blades to get you started, this is great as it allows you to cut a selection of materials and thicknesses and you can get packets of replacements blades for the ones you use the most often. A point to note with a hacksaw is that when you are fitting the blade the teeth point forward! The blades often have an arrow on them to help you.
Set of Files
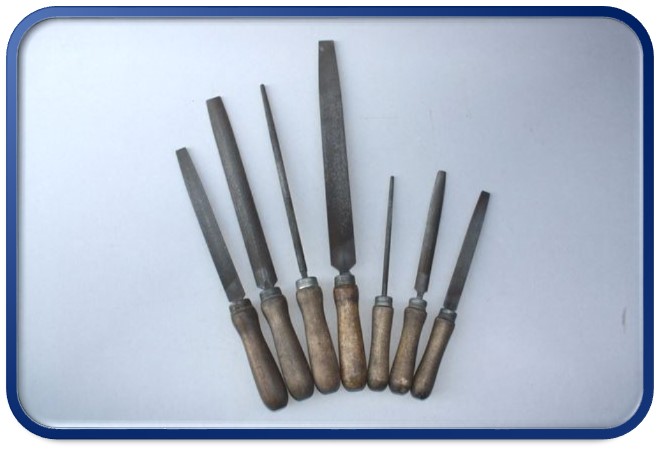
Even if you only plan on doing woodwork a set of files are still well worth having. If you are into metal work these are a must have! There is a vest selection of files available, they come in different shapes, sizes and smoothness’s. A good basic set should contain a flat, a round and a half-round. As far a size goes around 250mm-300mm / 10in-12in of cutting surface is a good place to start with a medium smoothness known as a 2nd cut file.
Bench
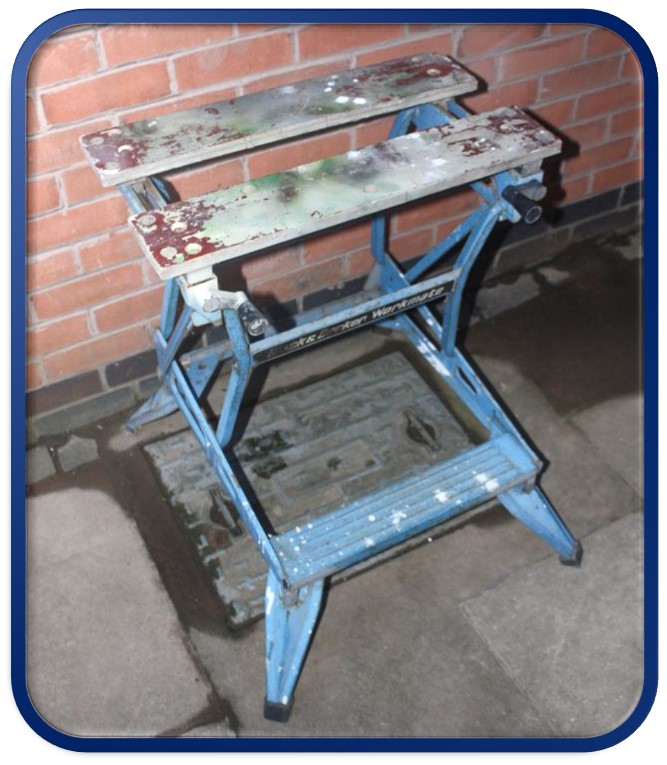
To maintain your relationship, you are going to need somewhere other than the kitchen table to do your work. That said a good solid old kitchen table does make a good workbench if you can repurpose an old one. A good workbench can be a lifelong investment however when you are stating out a workmate is a very versatile bench that will allow you clamp materials in place when you are cutting and shaping them. It also has the bonus of being able to fold up for storage, which is a big plus if you don’t have space for a dedicated workshop yet. My preference will always be for a solid (preferably fixed to a wall) bench but I would not be without a workmate as it allows me to have a bench right next to the job even if it is the other side of my workshop, in the house or even out in the garden.
Vice
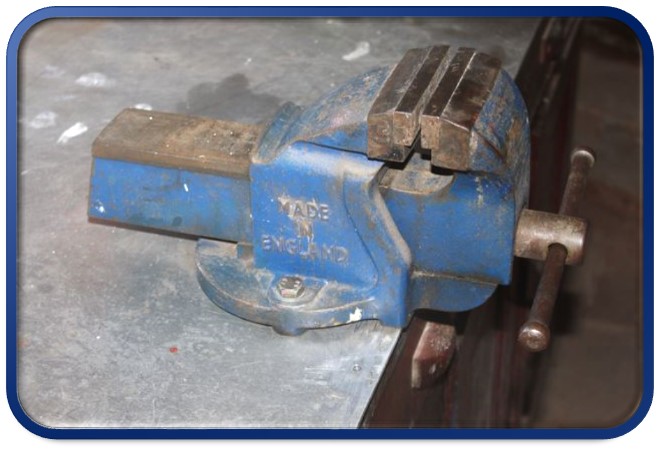
If you are lucky enough to have a dedicated workbench then a vice is a valuable addition as it will allow you to clamp your materials as you cut them, this is the next step up from the workmate but should not be considered as a replacement but as an addition, don’t get rid of your workmate! Vices can be extraordinarily expensive if you buy them new, thankfully they are readily available of the second-hand market via Ebay, Gumtree, Craigslist, factory closing sales etc. If you are buying second hand it is worth going to view the vice before committing to buy it. The main things to look for are that the jaws are parallel and that the handle spins freely without any ‘clunking noises’ as you open and close the jaws. As for size, a jaw width of 100mm-150mm / 4in-6in is the normal range. The vice I use has 100mm / 4in wide jaws and this has been enough for me. One final thing to consider with a vice is that it is not the sort of thing you tend to upgrade, if you get a good vice and look after it (i.e. don’t over tighten it) it will last you forever so it’s worth buying the best one you can afford.
Hammer
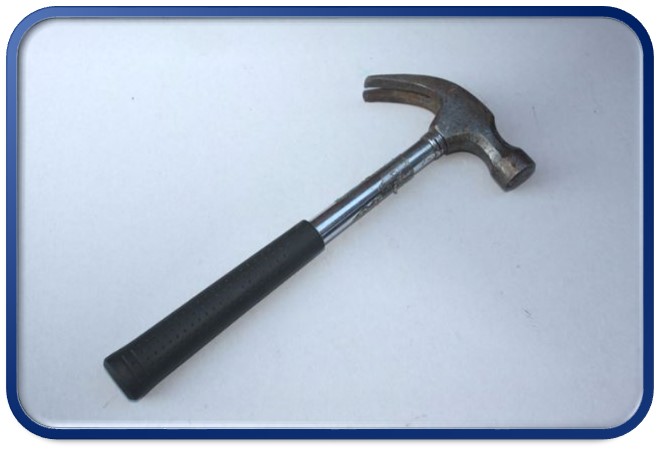
Where is my hammer, I want to hit something!!
The hammer, also lovingly known as the persuader and the tapping stick is often the tool of choice when frustration triumphs over finesse. That said there should be at least a couple in every toolbox as hammers are not a one size fits all tool, they come in different shapes sizes and weights depending on the job you want them to do. Probably the most well-known hammer is the claw hammer and as a beginner this is the one to get as it is a very versatile tool. The claw hammer allows you to insert nails using the hammers face and remove nails using the claw. The claw can also be used as a small crowbar. As a beginner your claw hammer will probably get quite a bit of abuse, so I’d highly recommend getting one with a steel shaft.
Cordless Drill Driver
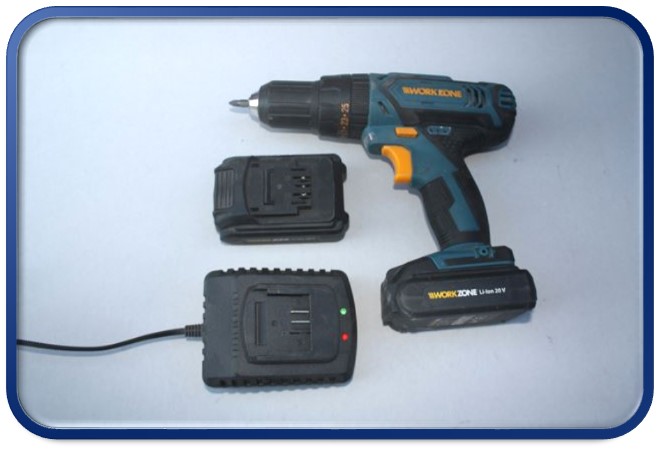
So here it is your first POWER TOOL and more than likely the one you will use the most. The cordless drill driver is a very versatile tool that can typically do three tasks in one light weight package. There is a lot to consider when buying any power tool so here are the basics of the cordless drill driver. They typically have three modes of operation;
- Screwdriver – For driving in and removing screws, get one that has adjustable torque to prevent over tightening.
- Drill – For drilling into non-masonry materials such as woods, metals and plastics – having a drill with a high and low range gearbox is good here as it allows a greater ranger of speeds which is important for different drill sizes and material types.
- Hammer Drill - For drilling masonry and brick - You will need special drill bits for this. But this is very handy especially for putting up shelves around the place.
Let’s just talk for a second about batteries. I have a love hate relationship with batteries I love the flexibility and portability of cordless tools, but I really hate it when the battery goes flat. Thankfully cordless tools have taken advantage of the latest advancements in Lithium battery technology and now last longer and change faster. What is my point… It is that you should buy one with a Lithium battery and preferably a spare, that way you never have to wait for a battery to change.
Some other features to look for are;
- Variable speed trigger – The harder you squeeze the faster it spins. Thankfully I have not seen a cordless drill in the last few years that does not have one of these.
- Forward and Reverse – For doing up and undoing.
- Carry Case – Most will come with a plastic case.
- Spare Battery – This is an absolute must for me.
- Belt clip – Not essential but handy if you are up a ladder.
- Work light – I’m not a huge fan of these as they rarely work very well as the drill bit normally casts a shadow over the area that you want to see but some people do like them.
Set of Drill Bits
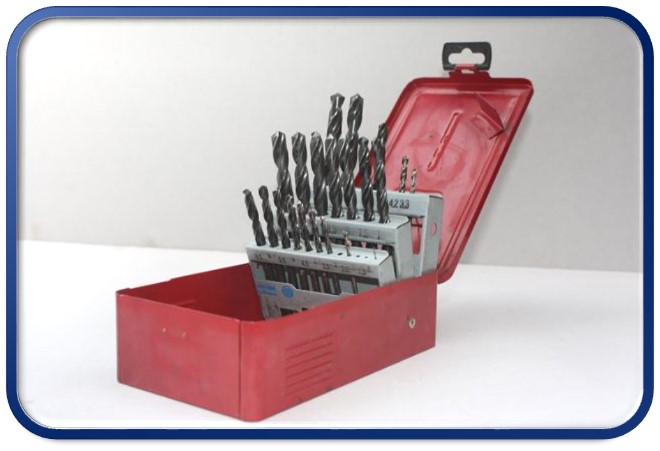
You have your new shiny drill, but you need some drill bits and you just opened the catalogue and, oww my…, where do you begin… There are Jobbers, Forstners, trepans, Stubbys, Long Series, HSS, TiN, Cobolt, 118deg, 135deg to name just a few of the options. But what does the beginner choose?
To get you started I would recommend a basic set of HSS jobber drills that range from 0.5mm to 13mm at 0.5mm increments or 1/16in to 1/2in depending on your preference. These will do all your general-purpose drilling but don’t go anywhere near stone or brick with them or they will instantly go blunt. If you do blunt a bit don’t worry they can be sharpened, or if you break one they can be bought individually and replaced to keep the set complete. If you want to drill into brick walls and stone, you will need some masonry bits. I typically just buy these in the size that I need as I don’t do a lot of masonry drilling.
Screwdrivers
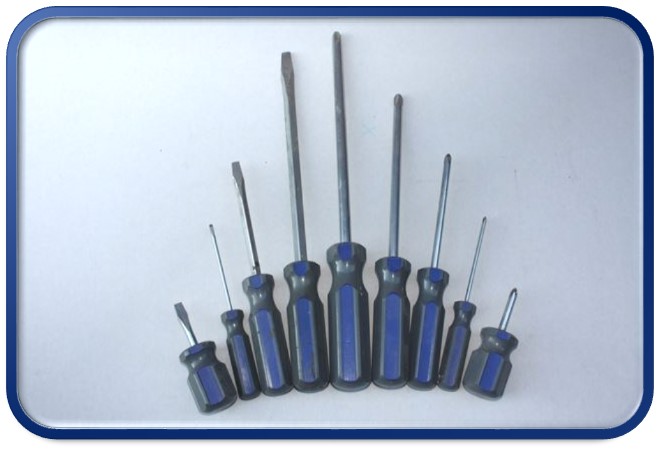
Something you may already have a few of, there are three main types of screwdriver flat head, cross head (Phillips) and Posi drive. Now in reality you want a full set of all three, the thing is that adds up the £$£$£s fast so I recommend a ‘screwdriver bit set’ with these sets you get all the most common screwdriver bits and often come with hex head (Allen Keys) and a few other exotics.
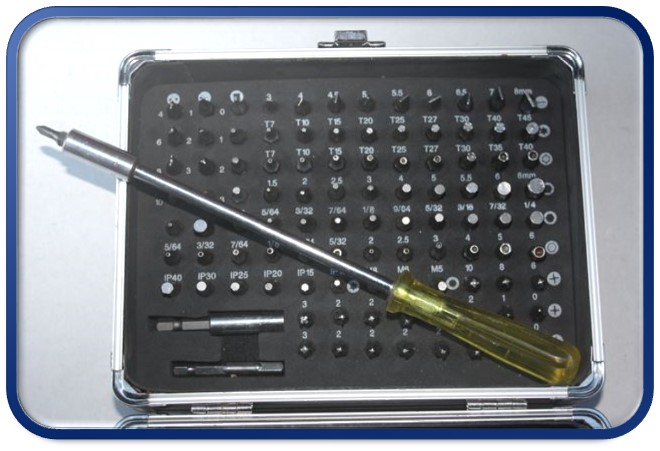
Many sets come with a magnetic driver as well so you just click the bits into the end of the driver and off you go. There are also ratcheting drivers if you want one. Another advantage of going down the ‘bit set’ avenue rather than individual screwdrivers is that the bits can be used in your cordless drill as well as in the hand-held driver.
Spanners
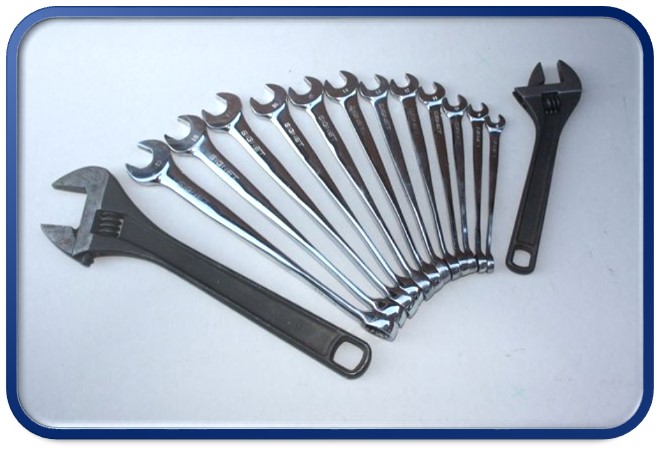
The thing with spanners is you often need two of the same size, one for the nut and one for the bolt. This means you need two sets and that can be very expensive. As a beginner, rather than going out and spending lots of money on two sets of spanners, money that could be better spent elsewhere, there are a few options. The cheapest option is a pair of adjustable spanners, this allows you to grip both metric and imperial nut and bolts of any size. Once you have a bit more experience you will know what size nuts and bolts you are often using and if you want can get the appropriate size spanners. You will also probably want to use a ratchet rather than two spanners since this is much faster which is another great reason not to go out and buy two sets of spanners.
Stanley Knife
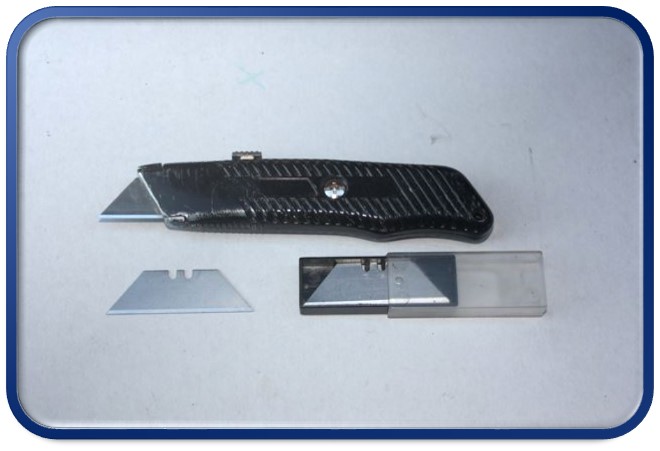
The Stanley knife is the final tool on this list of essential tools for the workshop beginner. Another very versatile tool that should be in every tool box. The Stanley knife is safe tool when used correctly, the blade can be retracted for safe storage and replaced when blunt. Stanley knifes are great for cutting out templates, scoring lines, cutting plasterboard, scraping off paints and sealants and much more. It’s also worth getting a case for your spare blades to keep them safe and sharp, you will often find that a Stanley knife will come with a blade carrier and some spare blades.
If you think I have missed anything off the list then feel free to contact me and let me know.
If you have enjoyed this post then please subscribe for FREE HOWTOs, Great Projects and more workshop related topics.