Welcome to this blog post documenting the construction of my workshop extension. If you are anything like me, the workshop is never quite big enough. My original intention was to build the extension and use it as a store room. However, once I got started I saw the potential to have separate workshop and garage spaces. The workshop extension also creates the opportunity to bring my Harrison VS330 TR lathe out of storage and get it up and running; A future project.
Operation Workshop Extension
There was a small area of dead space beside my existing garage, that like most dead spaces, was full of rubbish. Unfortunately, when the garage was built it was not built parallel to the garden wall. This left a sizeable but impractical space which ended up being used as a dumping ground.

The plan for the extension was to turn that dead space into a usable workshop. To do this I would have to build a new wall in line with the back of the existing garage and put a roof on top. Once I had a shell I would knock a doorway through the side of the garage to access the new room. Sounds simple enough…
Ground Works
Before I could start building the wall I first had to cast the foundation. I opted for a concrete trench fill foundation for two reasons;
- It was the same as the existing garage.
- I had used this method before and was confident that it would be successful.
Since the foundation would only be 3 ½ m long I chose to dig it by hand. It turns out that our house is built on extremely clayey soil and what should have been a couple of hours work turned into a full day. I dug down to the same depth as the existing foundations and made the trench three times the width of the wall it would be supporting. I put wooden stakes in the trench so that I could see when I had poured enough concrete. Halfway along the wall there will be a pier so in this area the foundation must also be wider.

The foundation required about a cubic meter of concrete which I mixed in a normal builder's mixer borrowed from a family member. The foundation cost around £65 for the materials; quite a bit cheaper than having ready mix delivered.
The wall
No not the one in Game of Thrones.
The first three courses of bricks are engineering bricks as they will end up underground. There is then the damp course and a course of blue bricks to match the existing garage wall. By the time I had laid the last blue brick I was just about getting the knack of bricklaying. Well kind off…

My next-door neighbour had a stack of bricks on his drive that I was lucky enough to buy for the grand sum of £50. Unfortunately, they were a different size and colour to the ones used to build the garage; but for 50 quid, I'm not complaining. In fact, I prefer them to the ones used to build the garage. I found a couple of old window frames in the loft that had been left by a previous owner, and built the wall to fit around them. To tie the new wall into the existing ones I used stainless steel wall starter kits. This was the only real option as I could not key the new wall into the old one as the bricks were a different size.

Roof Structure
The roof of the workshop extension was an interesting challenge as the room it covers is triangular. Therefore, to keep the pitch of the roof constant (1 in 40) the end above the new wall would have to be lower than the short end. Thankfully trigonometry is one of the few bits of maths I can do.
I was fortunate enough to be given some 7"x 3" (178mm x 76mm) joists that were removed from an old barn. This saved me a decent amount of money; All I had to do was take out all the old nails. There were just enough 7x3s to do the whole roof and the wall plate.

Due to the strange shape of the roof it was not possible to notch the joists onto the wall plate, so instead, I notched the wall plate to accommodate the joists; this worked perfectly. At the other end of the joists I used galvanised joist hangers attached to the top of the existing garage wall. The hangers were apparently surplus from a building job and I got the 12 I needed for £15 off eBay; Bargain!

Roof Covering
For the outside of the roof I used 6 sheets of 18mm (3/4in) OSB3. I then put 100mm (4in) of fibreglass insulation between the joists making sure to leave a 75mm (3in) air gap between the insulation and the underside of the OSB3 to prevent condensation. The inside of the roof was covered in Gypsum plasterboard to hide the joists, prevent the progress of fire into the roof and give me a flat ceiling.

I covered the OSB3 with bitumen felt to make it water proof. The strips of felt overlap by 200mm (8in) to prevent any leaks at the joints and were fixed in place using felt nails. Luckily Wickes had felt on offer so I got three rolls for the price of two and now have enough left over for a small garden shed. A quick tip: When you are storing felt make sure you store it on end. If you lay the roll down it will compress under its own weight and create little cracks. Then when you come to use it you will find that it is no longer water proof.
To finish off the outside of the workshop extension I clad any exposed timber with exterior tongue and groove and painted it with a brown water-based preservative. Thankfully there was not a lot of cladding required as it is surprisingly expensive. I used a brown plastic guttering to match the existing garage and the colour of the tongue and groove.

Finished Product
The whole process took around a month of evenings and weekends and was well worth the effort. I learnt some valuable new skills, such as bricklaying, which have already been used on other garden projects. As for the costs the whole project came in at around £800 with the breakdown detailed below.

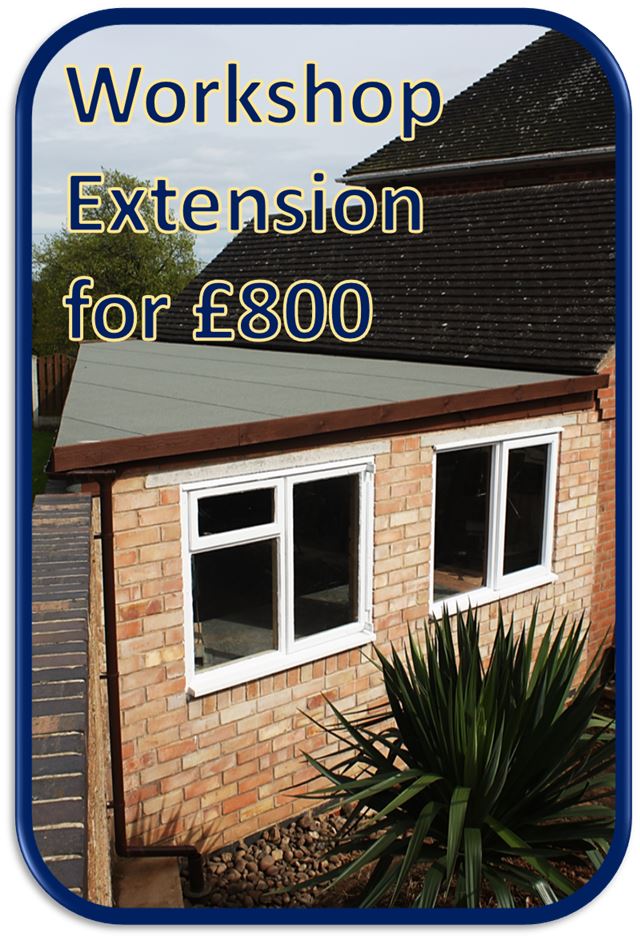
And here is the finished workshop a year after completion; Not looking too shabby even if I do say so myself.

Cheers,
Rob